Sunday, July 24, 2011

Kitchen Cosmetics Demo 8/6

Location: Brookline, MA. Close to the Harvard Ave. stop on the B (green) MBTA line. For the address, please e-mail Annabelle at info [at] herbalmedicinebox.com or RSVP through The Urban Homesteaders' League.

Cost: Sliding Scale, $15-$30

Details:

Ever wanted to learn how to make your own body care products? Many commercial body care products may contain ingredients or chemicals linked to toxicities. Your skin is your body's largest organ. If you can't eat it, why put it on your skin?

In this workshop, Annabelle will demonstrate how to make a homemade moisturizer cream, lip balm, and exfoliating scrub, all made with natural ingredients, and many of which can be found in your own kitchen! She will discuss the ingredients used for these products, and how the recipes can be customized to suit individuals' needs.

Everyone will receive a sample made in the demo.

RSVP: by e-mailing Annabelle at info [at] herbalmedicinebox.com or through The Urban Homesteaders' League.

Wednesday, July 20, 2011

Get Your Farmers Markets On!

The growing season in New England is in full swing! I've written before about farmers markets and The Lexington Farmers Market. If you don't already have a CSA and haven't made it to a farmers market yet, now is the perfect time to stop by!

Shopping at farmers markets helps to support the local community and helps to support the farmers, because you are buying directly from the producer. In addition to more flavorful and fresher produce when you buy fruits and vegetables that are in season, you may also find different varieties of fruits and vegetables at the farmers market that you can't find at the grocery store. By shopping at a farmers market, you can also learn more about the foods and how they are produced, because you can often talk to the farmer or producer. Nowadays, farmers markets contain more than just produce vendors: depending on the farmers market, you may also find fish vendors, meat vendors, baked goods, sauces and salsas, wine vendors, artisans, and more.

I biked from Brookline to The Lexington Farmers Market last week, and couldn't help but purchase some golden raspberries from F. Busa Farm's gorgeous fruit display.


To find a local farmers market near you, check out the Federation of Massachusetts Farmers Markets site, Local Harvest, this interactive Google map at Mass.gov, and Edible Boston's listing of farmers markets. And if you see Flats Mentor Farm at the farmers market, consider stopping by and seeing what they have to offer! Read my article about Flats Mentor Farm for the Lexington Minuteman here. Finally, when cabbage is in season (or you can use other vegetables as well!), how about making some sauerkraut?

Hope you are enjoying this season's bounty!

Thursday, June 30, 2011

Fermenting Rice: Amazaké

Ever since I first tried the fermented rice drink, amazaké, from Whole Foods, I've been intrigued at how to make it. It was hard to believe that such a sweet beverage could be made only with rice and a fermentation starter, without any added sweetener! Although amazaké literally means "sweet sake," it contains almost no alcohol because the fermentation process is stopped with the addition of heat. (Or if the fermentation process isn't stopped, then making amazaké can be the first step to making sake, the Japanese rice wine). Amazaké can be made with grains and koji, or it can be made with sake lees, which are byproducts from the sake making process. Like many other fermented foods, amazaké is thought to be very nutritious. For example, it is said to contain B vitamins. And because I love fermentation, I thought that making amazaké would be a great culinary endeavor!

Here, I am providing a brief recap of the recipe to make amazaké (a combination of the recipe listed in Sandor Katz's book, Wild Fermentation (1), and South River Miso's Amazaké recipe). For a more detailed set of directions, check out South River Miso's Amazaké recipe.

Ingredients:
-Water
-2 cups grain (I used brown rice, but other grains may be substituted, such as millet)
-2 cups koji (I ordered my koji locally from South River Miso. The koji is the fermentation starter, and here it's brown rice inoculated with the spores of the mold Aspergillus oryzae)


Directions

1. Cook the grain in 6 cups of water. Please note: do not add salt when cooking the grain.

2. When the grain is finished cooking, remove from heat, uncover the pot, and allow the grain to cool down to about 110-130° F. Don't let the grain get too cool- koji can tolerate temperatures as high as 140° F.

3. Add the koji to the cooked grain and stir well.


Brown rice with koji mixed in

4. Keep the container in a warm place for about 5-8 hours or overnight (at least 90° F or above). The amount of time you ferment the mixture will depend on the desired level of sweetness and the temperature. The higher the temperature, the quicker the fermentation process will take place. Do not let the grain get above 140° F, which can kill the koji. Suggestions for incubation: a rice cooker on keep warm, with a towel on top instead of the hard cover. Or incubate in the oven with a pilot light, in a hot water bath, etc.).


Amazaké after about 5 hours

5. When the amazaké is at your desired level of sweetness, gently boil it with some additional water or heat it up to stop the fermentation process (which will prevent the amazaké from turning into alcohol). Be careful not to burn the amazaké.

6. Amazaké can be stored for several weeks in the refrigerator. Serve the amazaké as is as a pudding, or add water to it and put it in a blender to made a sweet rice drink. You can also seasonings to it, such as honey or spices. Amazaké can also be used as a sweet base for various preparations, such as breads and baked goods. Read more suggestions for what to do with amazaké here.

My amazaké didn't turn out as watery as I thought it would be, so I ended up making sweet rice balls with my amazaké:


Amazaké rice balls, covered with black and white sesame seeds, coconut flakes, and sea salt, with a peanut in the center.

Two comments from my experience:
-I tried freezing some of the rice balls, but they did not taste very good after being kept in the freezer.
-I used a slow cooker to incubate and ferment the amazaké. However, from a quick google search, it seems that slow cooker temperatures, even on low, can reach temperatures to above 140° F. This meant that I was constantly monitoring the amazaké to try and ensure that it didn't get above 140° F (I didn't have a food thermometer, so I was estimating). So, ferment amazaké in a slow cooker at your own risk...

Amazaké is a fun and different way to enjoy your grains. In addition, amazaké is a great way to have a sweet snack that is also healthy, without any additional sugar added.

If you are interested in trying amazaké before you attempt to make it, I have found amazaké at various Whole Foods Markets and at the Harvest Co-Op. At the Harvest Co-Op, I've also found amazaké in various delicious flavors, such as Almond Shake and Go Hazelnuts. You may also find amazaké in your local Asian grocery store. If you have any stories about your experience with amazaké, please share!

Source:
1. Katz, Sandor Ellix. Wild Fermentation. White River Junction, Vermont: Chelsea Green Publishing Company, 2003, p. 118-119.

Thursday, May 5, 2011

Aromatherapy Course

This past February, I completed an Aromatherapy Certification Course with Clinical Herbalist, Linda Patterson, at The Boston School of Herbal Studies. This course ran from November-February, one Saturday class a month from 10 am - 5 pm.

In the course, we learned about the different body systems (including the respiratory system, digestive system, olfactory system, and more), their typical ailments, and the essential oils used to treat these ailments and body systems. Throughout the course, we were introduced to 50 essential oils, and techniques used for blending them.

It was pretty amazing to learn what essential oils can do. They can be used to treat numerous ailments, including depression, muscular pains and aches, infections, stress, and more. After taking the class, it was hard not to purchase a variety of essential oils.


Every essential oil has different properties, and it's fun and interesting to learn about, to experiment with, and to combine different oils. Essential oils can be expensive, though, and if you did have to narrow down the ones you were buying, these are the recommended top two: Tea Tree, the "king" of essential oils, and Lavender, the "queen" of essential oils. Tea tree essential oil is primarily known for its antimicrobial, antifungal, and antiviral properties, which also make it a great natural preservative in homemade body care products. It is also a powerful antiseptic, and has many other uses. Lavender essential oil is very calming, has an enjoyable floral fragrance, and is cytophylactic, encouraging the growth of skin cells, among other numerous benefits. For a book on the properties of different essential oils, The Directory of Essential Oils by Wanda Sellar is one recommended read.

Where to purchase essential oils? Throughout the course, Linda persistently reminded us about the importance of using practitioner grade essential oil whenever possible, meaning that the essential oils in the bottle contain only the oil from the first distillation of the plant, ensuring that the oil is of the highest quality and integrity. (As opposed to the same plant material being distilled twice, ensure that there are no other preservatives or other ingredients put into the oil, etc.). To guarantee that your essential oils are of good quality, you may need to do a little research. Currently, I purchase essential oils from Aromatherapy International, because this company has essential oils of high quality and there is a distributor of this line in Boston. Other recommended companies to purchase essential oils from include Floracopeia (they are expensive but their essential oils smell AMAZING) and Fragrant Earth.

Essential oils can be applied using various methods. A single essential oil diluted in a carrier oil or a blend of 3-5 essential oils diluted in a carrier oil can be applied topically. Carrier oils can be any type of oil, such as almond oil, apricot kernel oil, extra virgin olive oil, etc. Typically (but there are some exceptions) it is not recommended to apply essential oils topically by themselves without a fat or some type of carrier oil, because essential oils are very strong. In our class, we diluted 15 drops of essential oil in 1 oz of carrier oil. In addition, we learned never to take essential oils internally (again, essential oils are STRONG). However, this opinion differs depending on who you talk to.

Another way that essential oils can be enjoyed is by diffusers and nebulizers. In order to preserve the quality of the essential oils, especially if you are using them for medicinal purposes, it is important not to add heat to them (this rules out most diffusers, such as candle diffusers). Nebulizers technically are not supposed to use heat when diffusing the scent of an essential oil across a room. For example, a picture of a glass nebulizer can be found here. The downside to this nebulizer is that it requires a lot of essential oil when using it, and it is very hard to clean. The other nebulizer that was recommended to us in the course was the Heavenly Scent Diffuser/Nebulizer:

Heavenly Scent Diffuser/Nebulizer

Add some water to the nebulizer and 5-7 drops of essential oils, plug it in, and you can enjoy the scent for 50 min. - 9 hours, depending on what timer settings you choose. The downside is that the diffuser does use specially designed plastic cups to put the essential oils in for use. However, they last for quite awhile and shouldn't need to be replaced often. The upside is that the nebulizer does not require much essential oil for use, is easy to clean, has a convenient timer, and produces a lovely mist! To diffuse the essential oils, this nebulizer uses a fan that breaks down the molecules of the essential oils, and releases them into the air. The Heavenly Scent Diffuser can be purchased from Aromatherapy International. Something to remember if purchasing a nebulizer other than the ones mentioned here is that not all nebulizers sold are actually nebulizers. Again, technically, nebulizers aren't supposed to use heat to break down the essential oils, whereas diffusers can use heat. Many nebulizers sold on the market may use heat, even if they are called nebulizers. So if you are considering purchasing a nebulizer, make sure that you are in fact paying for a nebulizer, and not a diffuser!

Finally, in our last aromatherapy class, we made several natural body products, and applied our essential oil blending techniques to use in the products. Items we made included body powders, bath salts, and a moisturizer cream.

I thoroughly enjoyed the Aromatherapy Certification Course, and would highly recommend it to others. For myself, I've found it important to learn more about my health and ways to take care of myself using natural methods. If you have any questions about the course, please let me know! And to learn more about The Boston School of Herbal Studies and the classes that they offer, check out their website and join their mailing list!

Thursday, April 28, 2011

Living Foods Lifestyle Program: Wrap-Up

After eating a vegan, raw food diet for two weeks, it's strange being back in Boston and to be introduced to cooked foods again! Here, I would like to wrap-up my experience doing the Living Foods Lifestyle Program at the Ann Wigmore Natural Health Institute.

As I mentioned in my post on day one, we were kept rather busy in the program. On the weekdays, there was optional yoga at 6:15 am, juicing and drinking wheatgrass from 7:30-8:30 am, silent breakfast from 8:30 - 9:15 am, class until 12:30 pm with a break for snack in-between, and a nice afternoon break that was perfect for taking naps, with optional yoga at 2:45. Classes resumed at 4:15 until 6 pm, then dinner, and a final class at 7 pm. See sample schedules of the institute's programs here. Topics varied, with classes based on nutrition, disease, and health, the mind and the body, how to grow your own food,

Learning how to grow wheatgrass and sprouts

Composting class. Their composting system is very efficient- this pile turns into usable compost within a mere six weeks!

how to prepare your own food,

Preparing zucchini flaxseed crackers in Food Dehydration Lab

and more.

Coconut experience class. Mmmm fresh coconut water and coconut meat!

Because of my interest in nutrition, health, gardening, and food, I enjoyed many of the classes. One topic that struck me was how they reiterated the importance of cleaning your colon, via enemas and implants. The colon is an extremely important organ, after all. Although I had been nervous about doing them at first, I actually began to enjoy the clean feeling that I got after doing enemas. The wheatgrass implants, however, are something that I still need to get used to. I even got a colonic at the institute (which apparently are as strong as approximately 40 enemas) to see what it was like. It was a strange and interesting experience, but I did enjoy the clean feeling that I got after completing the colonic. Even though I can't imagine getting colonics on a regular basis, I imagine that some colonics lie in my future.

As for the food, energy soup, a combination of blended greens, sprouts, sprouted peas or lentils, and rejuvelac, made the base of the diet at the institute. Other toppings allowed to be added to the energy soup included papaya, a source of fat (usually flax cream or sunflower seed yogurt), pureed garlic, pureed sauerkraut, and dulse flakes, as pictured here. Because the energy soup is so nutritionally dense, somewhat predigested because of the addition of the fermented rejuvelac, and because it is the base of the diet at the institute, the soup was available at all meals and available in the fridge throughout the day.

When I first arrived at the institute, the energy soup tasted ok to me. After all, it is basically just a salad, blended. However, the second day that I was at the institute, I got extremely sick, with diarrhea, nausea, and vomiting, and was rushed to the hospital. There, they replenished my fluids with several IV bags of saline solution. Reasons for my sickness may have been a bug or virus of some sort, related to detoxing, and/or related to a deficiency in salt and electrolytes. At the institute, no salt is used, except in the form of seaweed, which was usually available as dulse flakes that we could sprinkle on our food. In any case, after my sickness on the second day, I had trouble drinking the energy soup, perhaps because of the traumatic experience.

Besides the energy soup, the other food option at silent breakfast, which you were not allowed to combine with the energy soup, was a fruit salad (usually papaya and banana) with sprouted and dehydrated buckwheat that you could sprinkle on top.
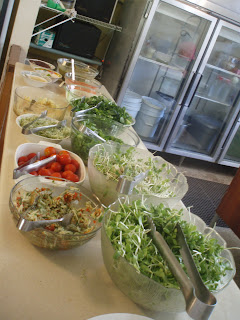


Lunch was typically a salad bar and energy soup.


For dinner, energy soup was available daily, and there were usually some flaxseed crackers to go with it as well. Snack in-between meals (one at 11 am and one at 3 pm) was usually coconut water, and occasionally fruit, such as bananas, oranges, or papaya.

On day one, I mentioned that wheatgrass was something that was new to me in the program. Despite the numerous reported health benefits of wheatgrass, I never got accustomed to it. It made me nauseous, which many of the others at the institute said was normal in the beginning. However, after a week of trying the wheatgrass and the continual nausea, I decided that it was time to give drinking wheatgrass a break. The second week, I continued to do several wheatgrass implants, but stopped taking wheatgrass by mouth. Although the wheatgrass didn't work for me this time, I imagine that if I return to a raw food center again at some point in the future, I'd be willing to give wheatgrass another try.

Besides being in classes, it was nice to travel around Puerto Rico on the weekend (renting a car or getting car access is necessary to get around in Puerto Rico). We went snorkeling, visited some beaches,

Beautiful, unnamed beach near the sand flats in southwest Puerto Rico

stopped by San German, the original capital of Puerto Rico,


enjoyed some beautiful sunsets,


and more.

Dinner at sea
We were definitely kept busy over the two weeks. But before I knew it, the graduation ceremony with joyous dancing and festivities came up,


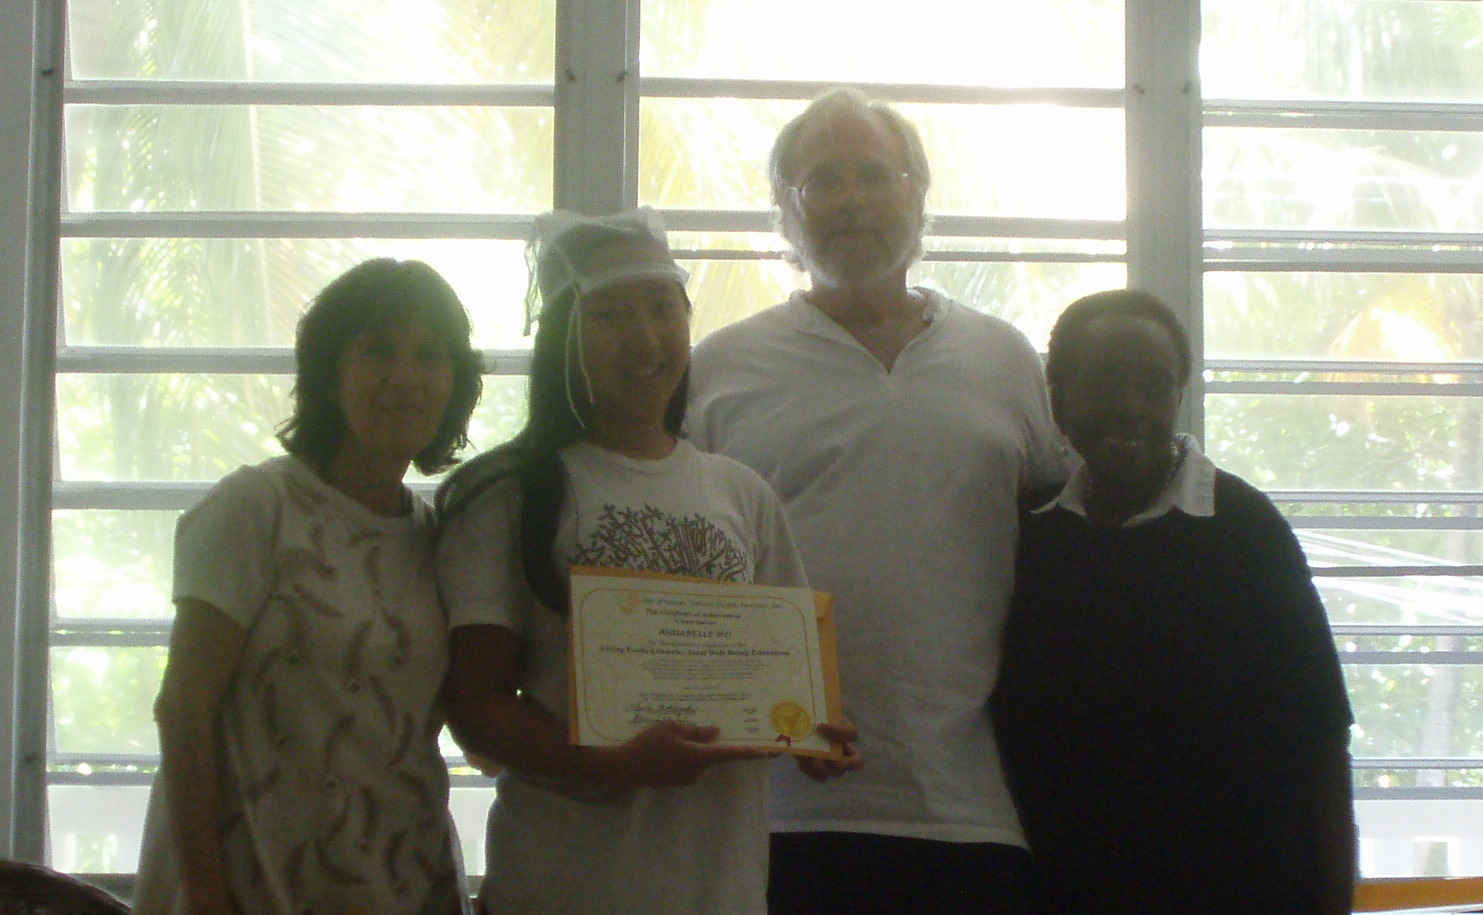
and I received my certificate for completing the two week intensive Living Foods Lifestyle Program.

Directors of the program, and me on the second left.

Me and my fellow graduates. Check out our graduation caps (sprouting bags).

The course had its ups and downs, but overall, I enjoyed the experience. It was great to talk to and get to know others who were interested in learning about this lifestyle and improving their health. In addition, it was great to meet so many people of different backgrounds and perspectives. Besides my classmates, there were also many returning students at the institute, who could come to any of the classes if they wished, or who could just enjoy the food and being at the institute and Puerto Rico. We were a very international community, with participants coming from all over the world, including Germany, numerous French-speaking regions, Iceland, Ukraine, and more. The staff was very friendly and supportive, and to be in this supportive environment with others who were going through the same thing as me provided encouragement throughout the program.

How has my return to Boston been? For starters, the flight was a bit of a disappointment. I had planned to leave late Friday night the day my program completed. However, because of a delay in my connecting flight to Boston, I had to reschedule my flight for two days later. I was not happy with Spirit Airlines because a similar problem had occurred on my way to Puerto Rico as well. After this experience, I am not sure if I will be taking Spirit Airlines again.

In other aspects, as I mentioned in the beginning, it is strange to return back to having the option of eating cooked foods again after eating raw and vegan foods for the past two weeks. One of the most significant changes that I've noticed is salt. Because there was no salt used whatsoever at the institute except for the dulse flakes, I am now more aware of any additional salt added to foods. Additionally, the diet was gluten-free at the institute. Although I am not planning on remaining to be completely gluten-free, I am hoping to have a diet that will contain less gluten than what I was originally eating before the program.

Do I plan on staying raw and vegan? Not at the moment. I enjoyed the experience of eating a raw and vegan diet, but I don't think that this diet is right for me at the time, for numerous reasons. Staying raw and vegan is especially hard for those who live in regions with cold winter climates, such as Boston. I also enjoy occasionally eating and getting nutrients from non-vegan foods, such as eggs, fish, meat, and poultry (although of course I aim to purchase as much ethically and sustainably-produced foods as possible, such as organic and local foods and grass-fed meat). I plan to slowly incorporate some cooked and non-vegan foods in my diet, although I plan on keeping some raw foods in my diet, as well (who doesn't love salads, fresh fruits and vegetables, and fermented foods?), and to do what I feel is best for my body. Something important that I remind myself from the Institute for Integrative Nutrition is the concept of bio-individuality: everyone's body has a different constitution, and everyone has different needs. I did enjoy eating a clean, unprocessed diet for two weeks (and losing eight pounds!), but eating a raw, vegan diet isn't appropriate for me at the time.

I enjoyed the experience. However, I don't imagine that I will be retuning back to the Ann Wigmore Natural Health Institute. In the future, I hope to visit some other raw food centers, such as the Optimum Health Institute and the Hippocrates Health Institute, and am looking forward to seeing some of the similarities and the differences between the programs.

If you are considering visiting a raw food center at some point, or if you have any questions about this lifestyle or the program that I attended, please feel free to contact me!

Monday, April 11, 2011

Living Foods Lifestyle Program: Day 1

Today was my first day at the Ann Wigmore Natural Health Institute for their Living Foods Lifestyle Certification Program: 2 weeks of eating, learning, and immersing in a vegan, raw, and living foods lifestyle in sunny Puerto Rico.

But before I get into the program, I'd like to backtrack into how I got there:

The plane ride to Puerto Rico was not the best. A delay in one of my flights meant that I missed a connecting flight, so alas I had to stay an extra day in New York City. The upside was that in my NYC I was able to visit One Lucky Duck, which offers raw foods and juices, and Candle Cafe, which offers vegan and farm fresh food options. The sushi at One Lucky Duck was delicious, filled with marinated shiitake, avocado, asparagus, red pepper, jicama rice, and nama shoyu. However, their chocolate garnache tart, although good, was extremely dense and something that you will want to share with many friends. At Candle Cafe, I loved the BBQ Tempeh and Sweet Potato sandwich served with a side salad and an amazing shallot sage aioli. Their vegan and gluten-free oatmeal and chocolate chip cookie was on the slightly dry and crumbly side (probably due to the spelt flour), but it was good considering that it can be hard to make a good gluten-free cookie.

After rescheduling my flight and after an 8 hour layover at the Fort Lauderdale airport in Florida, I was happy to finally arrive at the Ann Wigmore Natural Health Institute at 3 am this morning.


please note that these pictures were not taken at 3 am

I have to say that I cannot complain about the surroundings.

The beach next to the institute

A few hours after my arrival, I woke up tired but enthusiastic for my 7:30 am class on juicing wheatgrass. After our class on wheatgrass, we went into the dining room for breakfast. Today's breakfast options were a fresh papaya and banana salad with sprouted buckwheat grains, or energy soup, made with blended green vegetables and sprouts, and that could be topped with various toppings such as pureed ginger and dulse flakes. Breakfast at the institute is the one meal that is always silent, allowing individuals to focus on the meal and to concentrate on chewing, a part that can be often forgotten about in eating: chewing is the first step in the digestive process, allowing the enzyme salivary amylase in our saliva to begin breaking down the food in our mouths as we chew.

After breakfast we had a two hour class learning more about Dr. Ann Wigmore and the institute, which was broken up by a 15 minute snack. Then we had lunch, optional yoga at 2:45 pm daily (there is also yoga daily at 6:15 am), another snack, and then class again at 4:15 where we learned about enemas and implants. Dinner is regularly at 6 pm, and after dinner there is typically a class at 7 pm. Classes are on weekdays, and weekends we get off.

Dinner, featuring energy soup, papaya, sunflower seed yogurt, dehydrated flax seed crackers, and various toppings

If eating raw foods is something that you are new to, it definitely takes some getting used to. Even though raw foods has always been an interest of mine in reading, culinary adventures, and dining out, going completely raw and vegan in my diet is not the same as reading about and dabbling in it.

Rejuvelac, a fermented beverage, is always on hand. Pictured here is rejuvelac made from cabbage (left) and quinoa (right). The cabbage rejuvelac is basically like drinking sauerkraut juice.

Two daily activities that I know that I'll need some getting used to are juicing and drinking wheatgrass regularly twice a day (the wheatgrass flavor is strong) and the enemas and implants (enema: clearing the colon, such as with filtered water, and implant: here we implant the colon with wheatgrass juice for cleansing and detoxification. Read more about enemas and implants here). Of course, you only do what you are comfortable with in the program, and it's important to listen to your body. Another challenge that will be coming up very soon (tomorrow) will eating only blended foods for the next three days!

These next two weeks will be an experience featuring different and new food and lifestyle challenges. I am interested to see how my body will adjust to these changes, and also how my diet and lifestyle will change after I return from this trip. Overall, I'm glad to be here, I'm sure that this will be a worthwhile and learning experience, and I'm looking forward to what the next two weeks will bring!

Thursday, March 31, 2011

Natural Body Care Demo

It's been a whirlwind of demonstrations lately! Two weeks ago I had a Kombucha Demo with The Urban Homesteaders' League, this past Sunday I did a Food Preservation and Fermentation workshop at Bountiful Brookline's annual Spring into Gardening event, and this coming Monday I will be teaching Natural Body Care demo with The Urban Homesteaders' League. All of this before an exciting two weeks doing Ann Wigmore's Living Foods Lifestyle Certificate Program in Puerto Rico: a comprehensive two weeks of learning about raw, living, and vegan foods! I am very much looking forward to beginning this program April 10, and I hope to write about some of my experiences here. But in the meantime, I am looking forward to my Natural Body Care demo this upcoming Monday as well, so here is the information about the demo below if you are interested in attending:

Natural Body Care

Date:
Monday, April 4, 2011

Time: 6:30 - 8 pm

Location: Brookline, MA. Close to the Harvard Ave. stop on the B (green) MBTA line, or the Coolidge Corner stop on the C (green) line. Please RSVP to receive the address. RSVP details below.

Cost:
Sliding Scale, $15-$30

Details:

Ever wanted to learn how to make your own body care products? Many commercial body care products may contain ingredients or chemicals linked to toxicities. Your skin is your body's largest organ. If you can't eat it, why put it on your skin?

Annabelle will demonstrate how to make homemade moisturizer creams, shampoos, lip balms, and more, all made with natural ingredients. She will discuss the ingredients used for these products, and how the recipes can be customized to suit individuals' needs.

RSVP: on the Urban Homeasteaders' League or by e-mailing me at info[at]herbalmedicinebox.com.

Hope to see you there!